Making a custom fit slipcover for a Bergere chair may seem difficult, but it’s easier than you think.
These classic chairs are a great mix of style and comfort. Making a slipcover is a great way to revive an outdated upholstery pattern without breaking the bank.
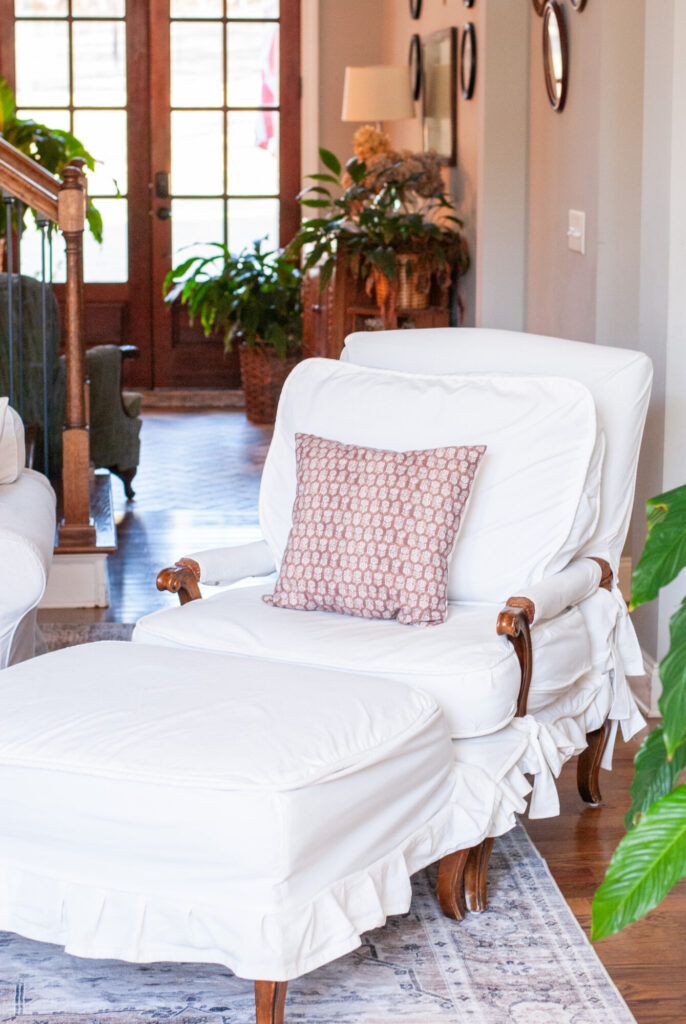
I found this French bergere chair on Facebook marketplace for a steal. It’s great quality, down-stuffed, and extremely comfortable. I’d been looking for the perfect chair with a similar shape for a while, so I couldn’t pass this one up.
When I picked the chair up, I immediately knew I wanted to make a slipcover for it. It’s hard to find pre-made bergere chair slipcovers, so I scrolled the internet lookin at slipcover design ideas.
I’m not a talented seamstress, and I’ve never sewn a slipcover before so I knew this would be a learning experience.
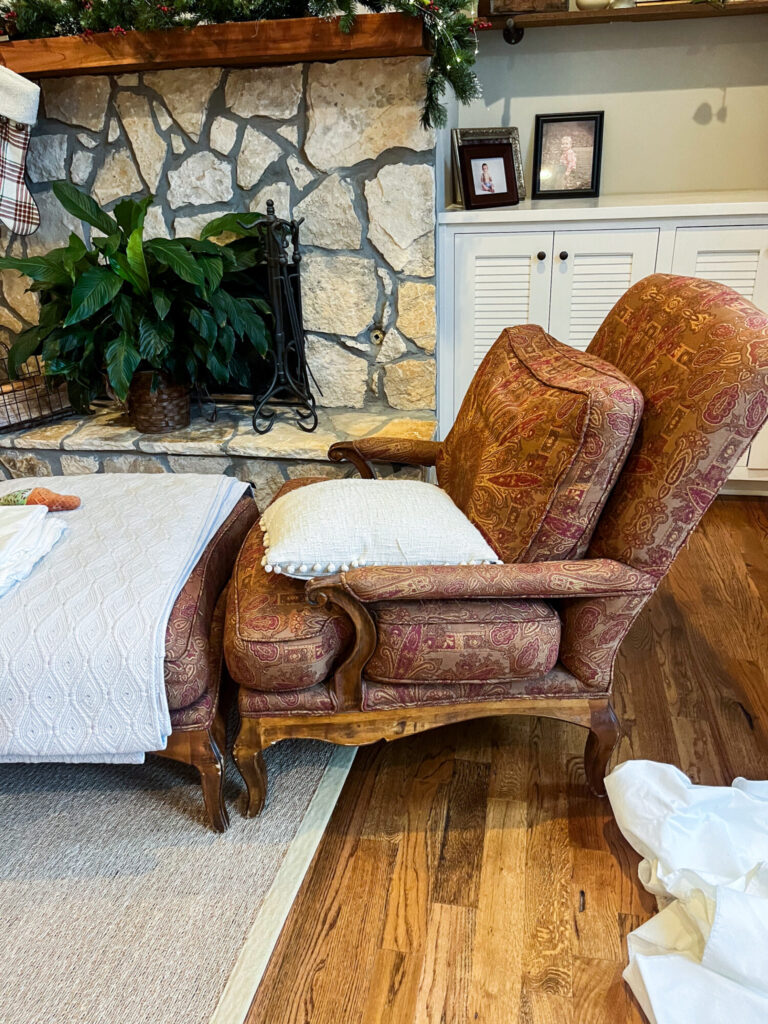
The first thing I did was look the chair over and decide how I was going to create the slipcover. I decided to sew it in several different pieces to make creating the slipcover easier.
Bleached drop cloths were used for the fabric for this project. It was very inexpensive and would give me the look I was going for without being very expensive.
If you’ve never bleached drop cloth before, Farmhouse on Boone has a great tutorial.
Note** If you’re planning on using drop cloth for this project, be sure to use one that’s seamless and is made from 100% cotton. This is the 6oz drop cloth I chose for the chair.
Making The Piping
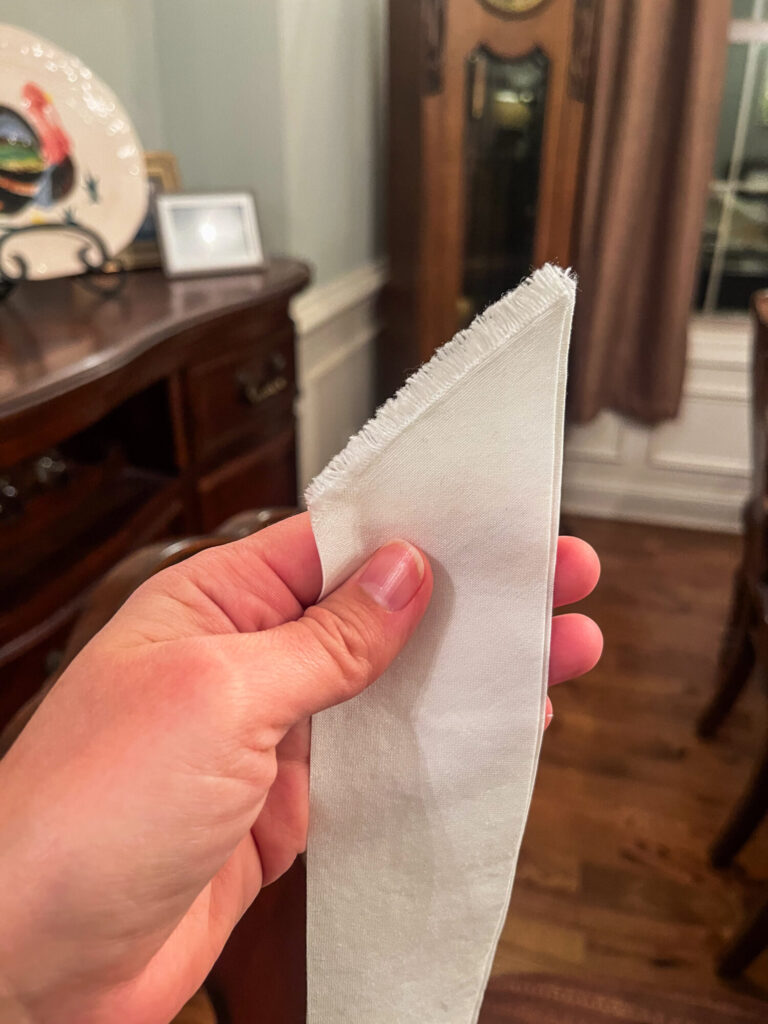
Begin by making your piping. Do this by cutting your fabric into 2-inch strips on the bias. Cutting the fabric on the bias will help it to bend and mold to your chair.
Measure the amount of cording you’ll need by loosely going around the chair where you’ll want piping. Give yourself a few extra inches.
Cut 2-inch strips in the fabric. Fold the fabric around the cording, and using a zipper foot, stitch it as close to the cording as possible.
The size cording you choose is up to you. I used a ¼-inch cording for this project.
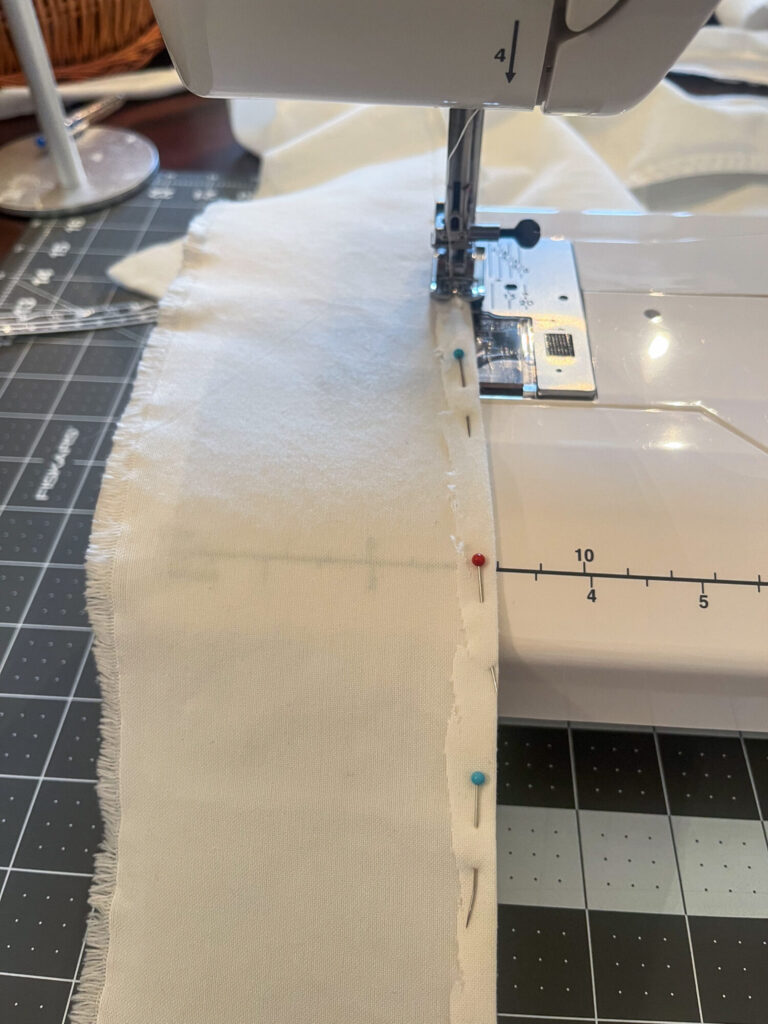
You can also purchase pre-made cording if you don’t want to sew your own. I’ve used it in other projects and it turns out great.
More Articles You’ll Love
Supplies Needed For A Bergere Chair Slipcover
*This post may contain affiliate links which means I make a small commission at no extra cost to you. Read my full disclosure here.*
- Drop cloth or upholstery fabric- I used around 10 yards for this project
- Fabric Scissors
- Sewing Machine
- Sewing Ruler
- Cotton cording
- Heavy duty Thread
- Iron
- Pins
Creating the Slipcover For The Bergere Chair
Sewing The Body Of the Chair
The first step is to place your fabric on the front of the chair right side facing in. I prefer to save the hemmed edges for parts of the slipcover that will need to be hemmed, so keep that in mind when you’re creating your slipcover.
Each chair is different, but you’ll need to cut the areas around the arms of the chair to allow the fabric to lay flat as I did here.
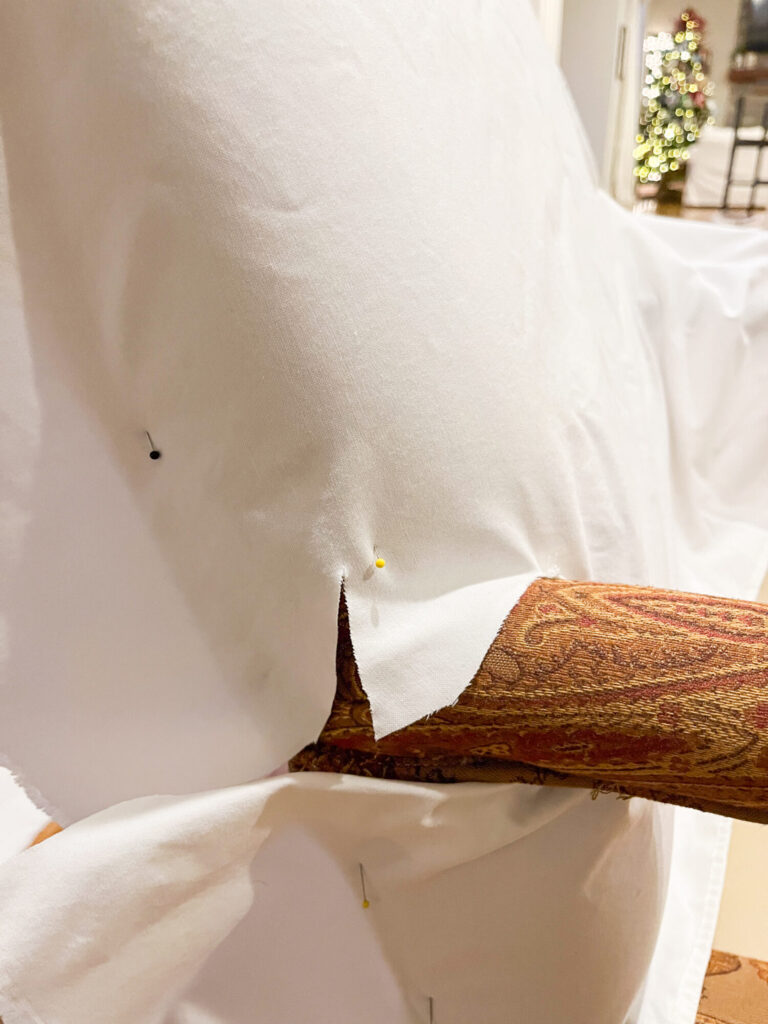
Be sure to give yourself a seam allowance when cutting. I tend to leave a lot of seam allowance, around 1” or so, in order to leave room for errors.
Pin the fabric to the chair so it will remain in place while you work on the other areas.
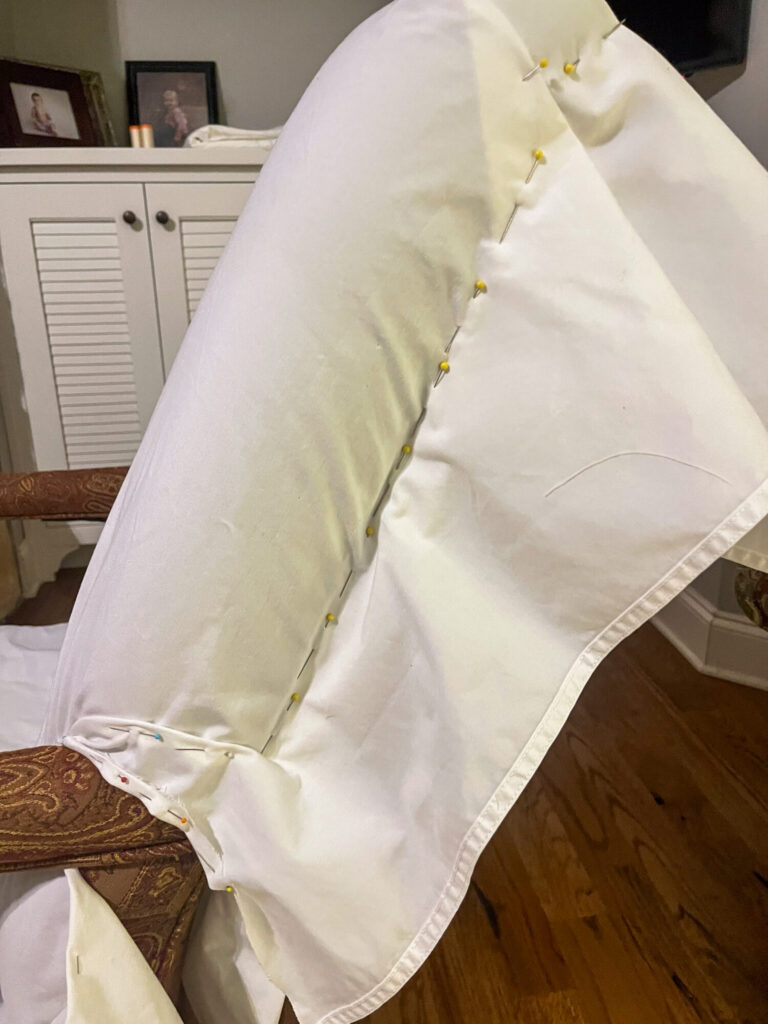
After measuring and cutting the fabric for the front of the chair, begin measuring the fabric for the back. This is a great place to use the hemmed edges of your fabric if you’re using a drop cloth.
The back of the chair should be in two pieces to allow the removal of the slipcover for washing.
Place the fabric wrong side up with the hemmed edges facing each other. Allow them to overlap by about an inch.
Allow a 1-inch seam allowance around the top of the chair to connect with the front piece.
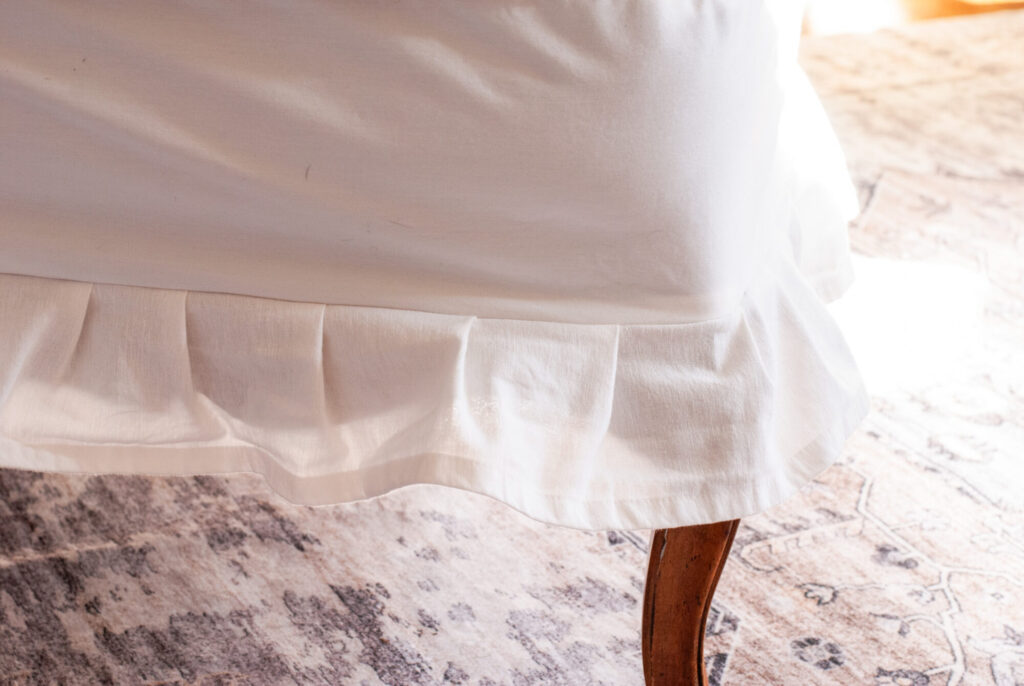
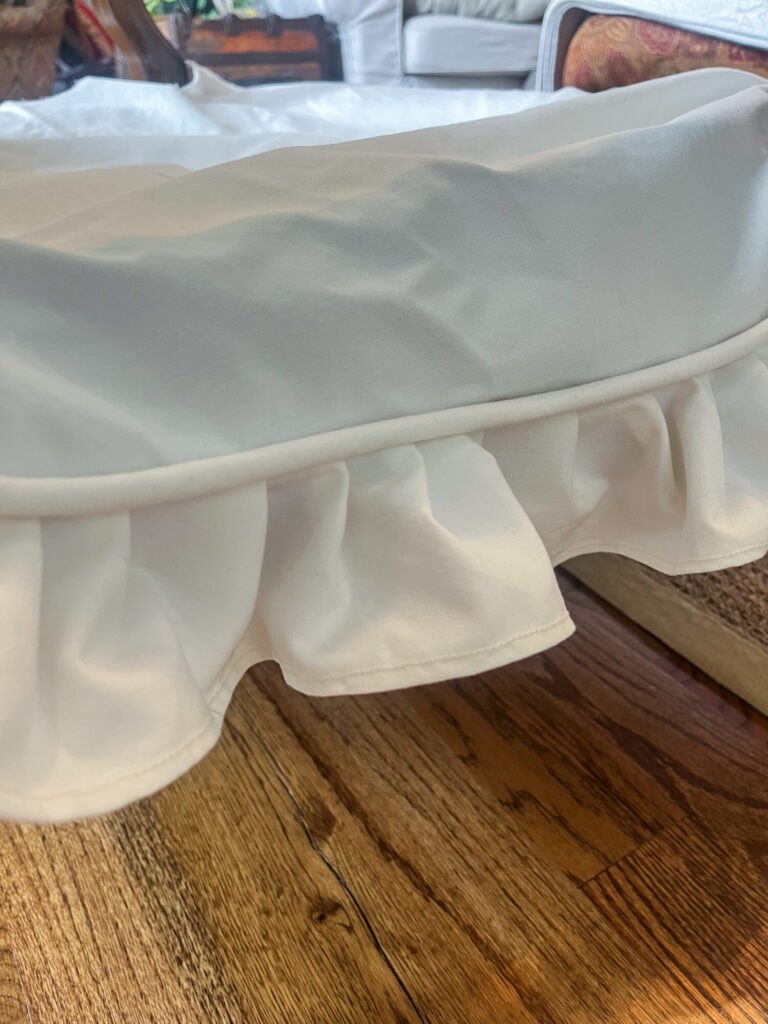
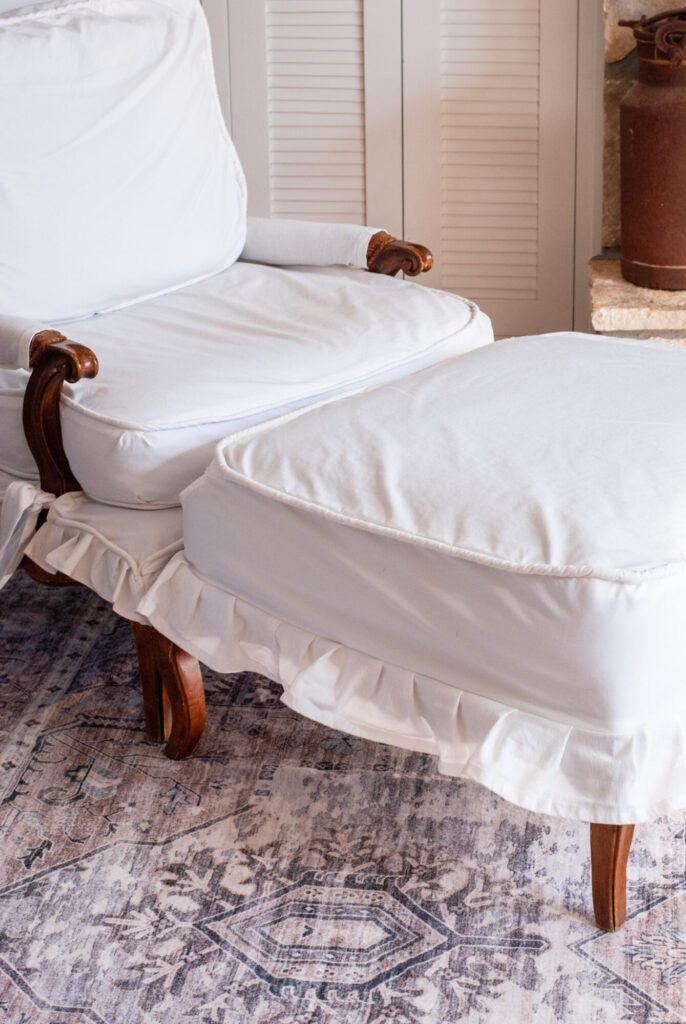
Also, allow a 1-inch seam allowance at the bottom of the chair for hemming. I chose to add a gathered ruffle around the bottom of the slipcover.
Creating A Ruffle
To create a ruffle, cut a 3-inch strip of fabric. Hem one edge of the fabric. Gather the other edge of the fabric and do a running stitch along the edge. This way you can adjust the ruffle however you like.
You could also do a pleated ruffle if you want to be precise. I don’t mind the ruffle not being perfect.
Pin the ruffle and the piping along the edge of the bottom of the slipcover.
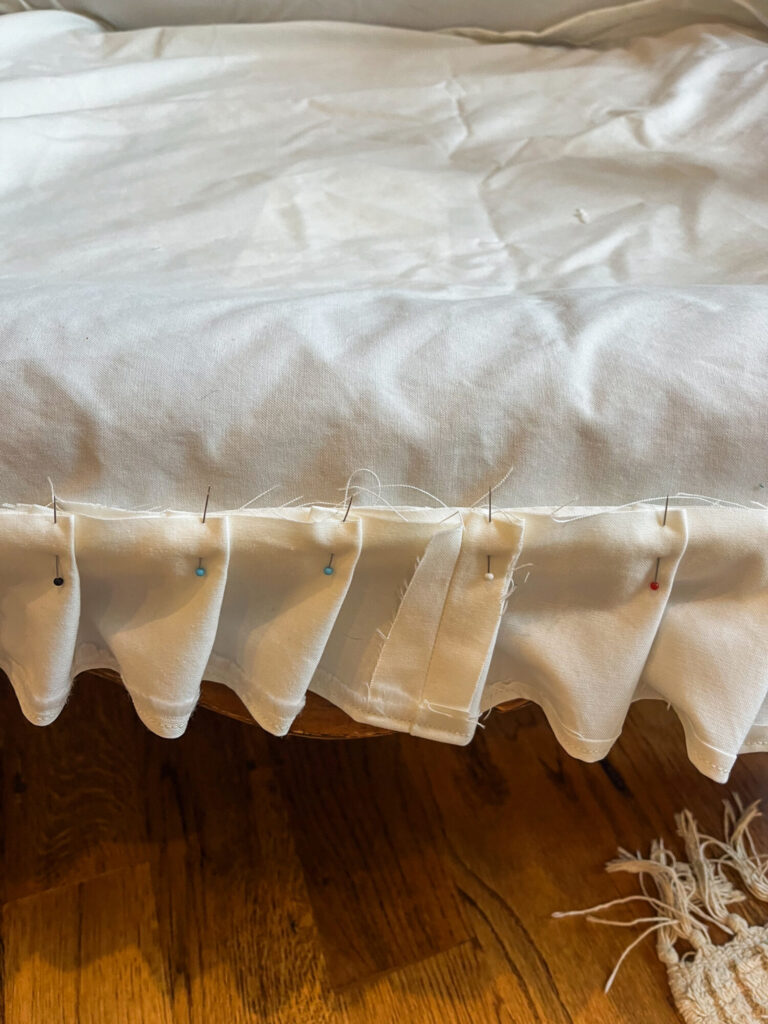
You’ll want the piping to be on the right side of the fabric, so it will need to be sewn upside down. Stitch all three pieces together.
Tip! If you have a serger now is a great time to serge the edge of your seam. This will keep the fabric from raveling. You could also finish the seam with a zig-zag stitch, I neglected to do this step and had to go back later to finish it.
Stitching the Body Of the Chair Together
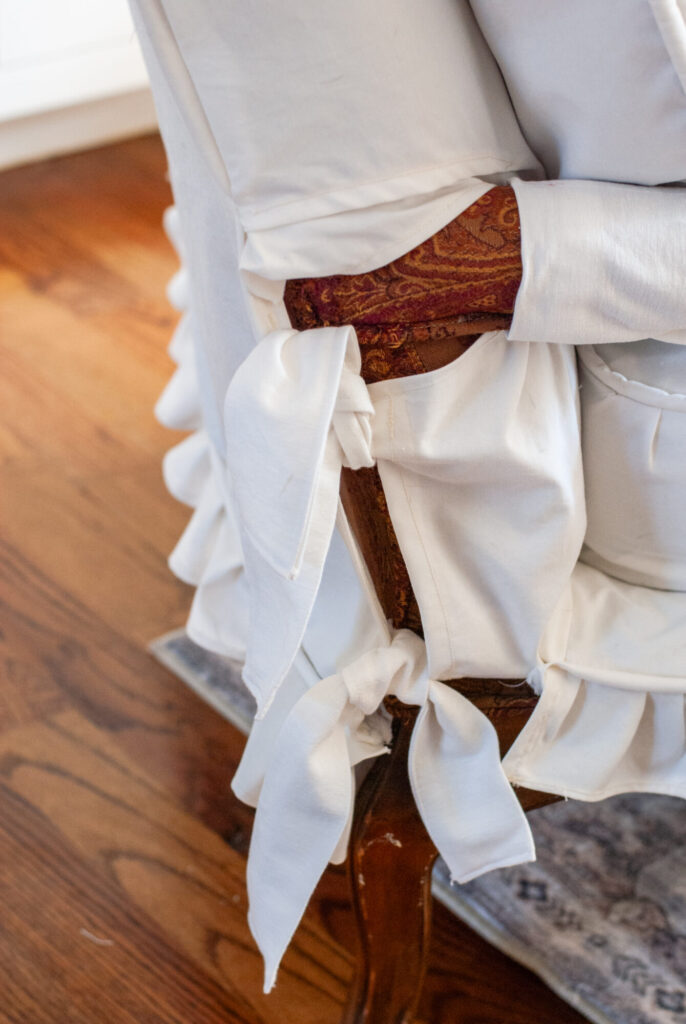
For the Berger chair, the arms were very thin. I chose to leave the areas below the arms open and decided to sew ties for them for easy removal.
You could use these ties as the primary way to remove the slipcover, which is what I ultimately chose to do.
However, it is very hard to remove so I regret not sewing a paneled back.
Next, pin the top of the back of the chair and the front of the chair together and add your piping. It’s best to follow the seam of the original upholstery. It will give you a straight line, and a natural placement for the piping.
Pin the fabric seam close to the chair for a snug fit. I place the pins in a parallel line along where I want the seam to go so I can use it as a guide when sewing. This is a good time to adjust your pin fitting if needed.
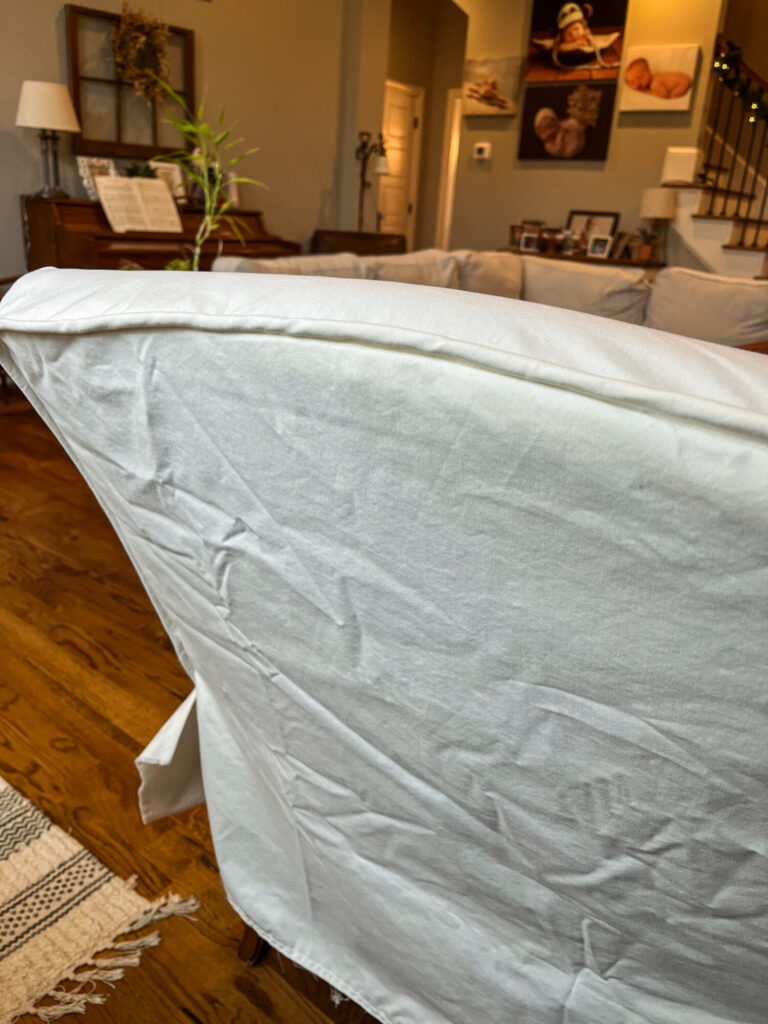
Leave the front and back edges open under the arms of the chair, and hem the rough edges.
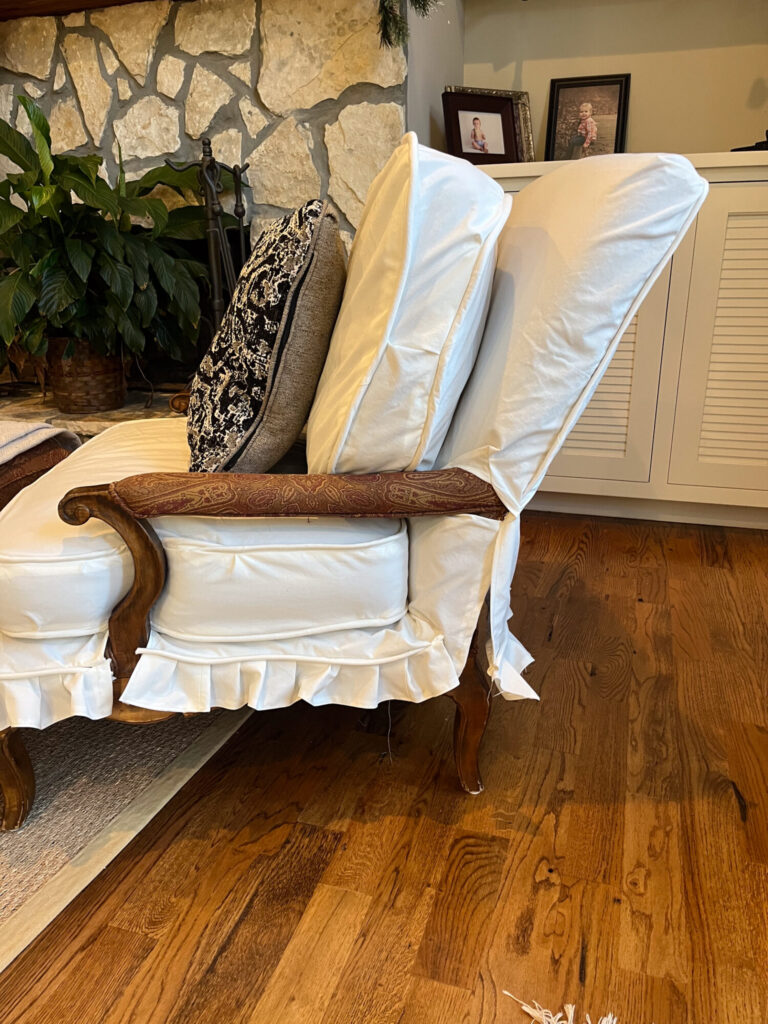
After you’ve completed the front and back sides of the chair, begin on the bottom seating below the cushions. This was pretty easy to sew on a Bergere chair because the arms do not go all the way to the seat.
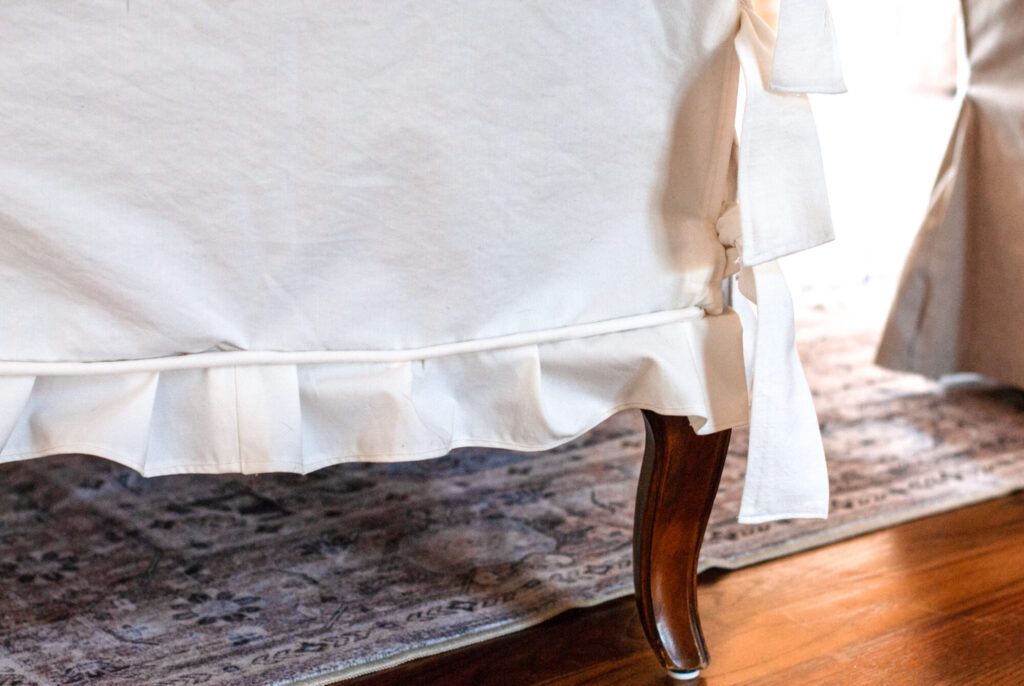
Simply sew the skirt to the bottom edge of the front slipcover body allowing enough overhang for a ruffle if you choose.
Again, I chose to add a ruffle and piping along the bottom edge of the chair’s skirt.
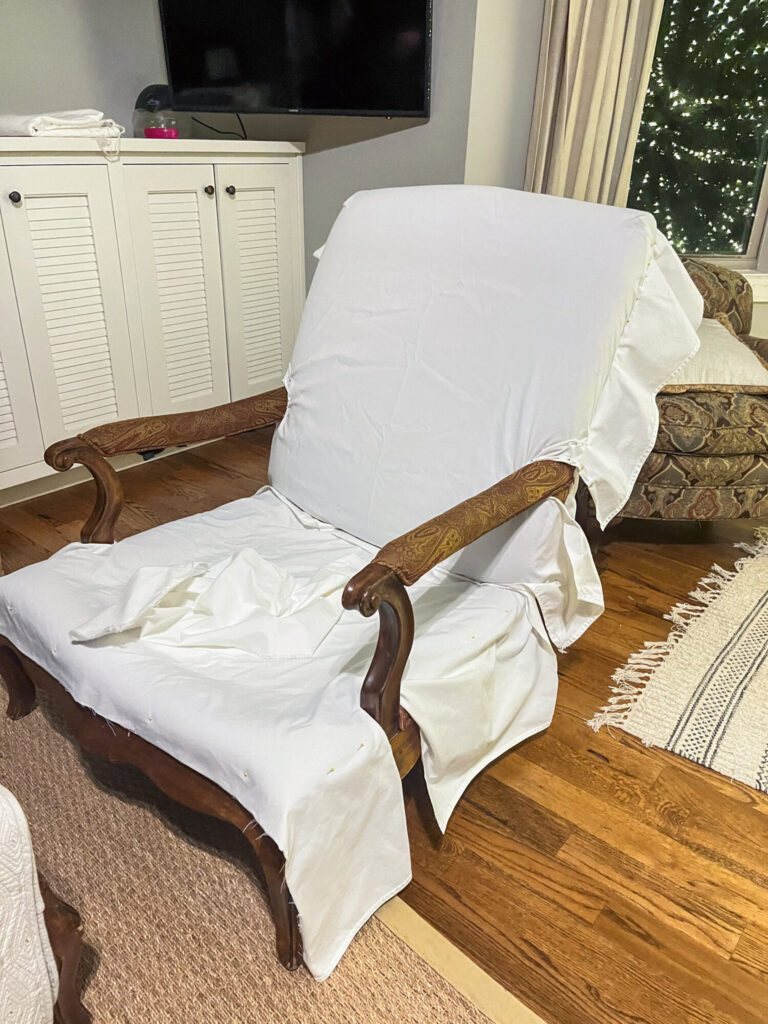
You may need to leave open areas around the supports for the arms. You can do this by hemming the raw edges and applying ties later on.
Sewing The Cushions of The Chair
Next, you’ll move on to covering the cushions of the chair. These cushions were easy because they already had piping along the edges.
Construct the cushions in 4 separate pieces. Begin by laying a solid piece of fabric over the top of the cushion. Leave enough seam allowance to account for the piping and seam.
Once you have sized and cut the top of the cushion pin it in place. Measure and cut a separate piece of fabric for the center of the cushion. It should wrap around the cushion creating a “box appearance”.
On the underside of the seat cushion, you will need two pieces of fabric. You’re going to overlap the edges similar to the back of the chair.
The overlapping of the edges allows for the removal of the slipcover for washing.
Connect the top piece, middle piece, and bottom pieces with piping sandwiched between the layers. This will close the cushion cover.
Again, be sure to pin the slipcover as close to the cushion as possible to ensure you have a snug fit.
Finish the seams of the slipcover with a serger or a zig-zag stitch to prevent fraying.
Repeat the process for all of the chair cushions.
If your chair also has an ottoman like mine did, create it using a similar process to the cushions.
Instead of applying a bottom piece, attach a skirt to the bottom of the slipcover at your desired length.
Attaching Ties and Covering The Arms
Lastly, you’ll want to apply your ties to the chair. I wanted thick, chunky ties to create a relaxed fit because the chair was so bulky. I created them by cutting by fabric into 4-inches wide and 8 to 12 inches long.
Press the outer edges of the strip to create a ¼ inch fold all the way around.
Fold the fabric in half and stitch along the outer edges to create your ties.
Apply the ties to the slipcover in your desired location. Pin the ties to the wrong side of the slipcover and attach them stitching around in a box for a secure fit.
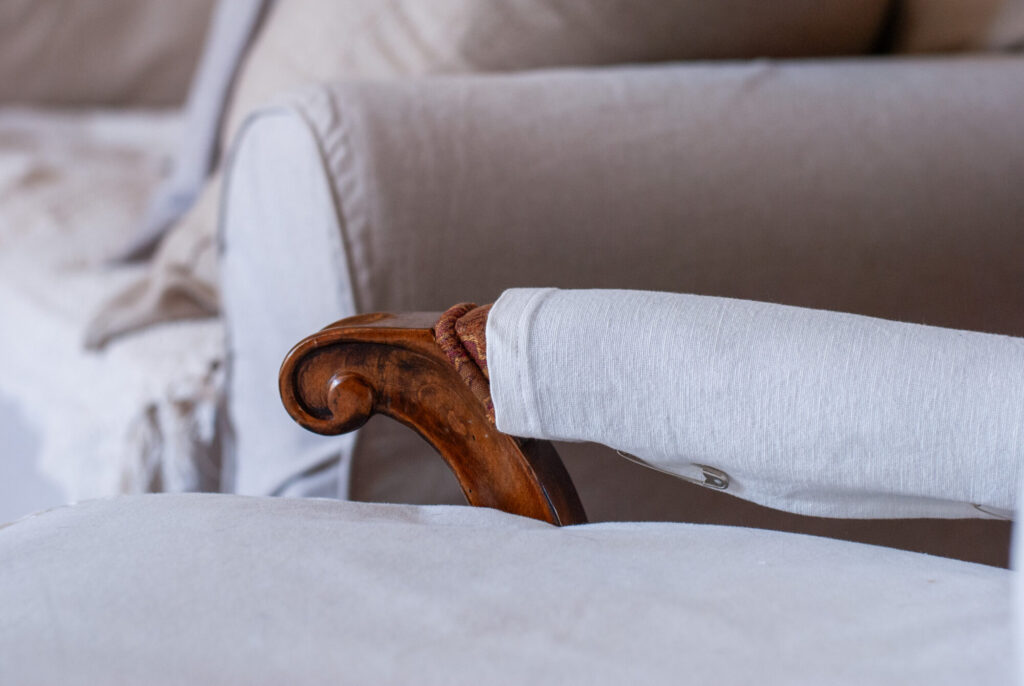
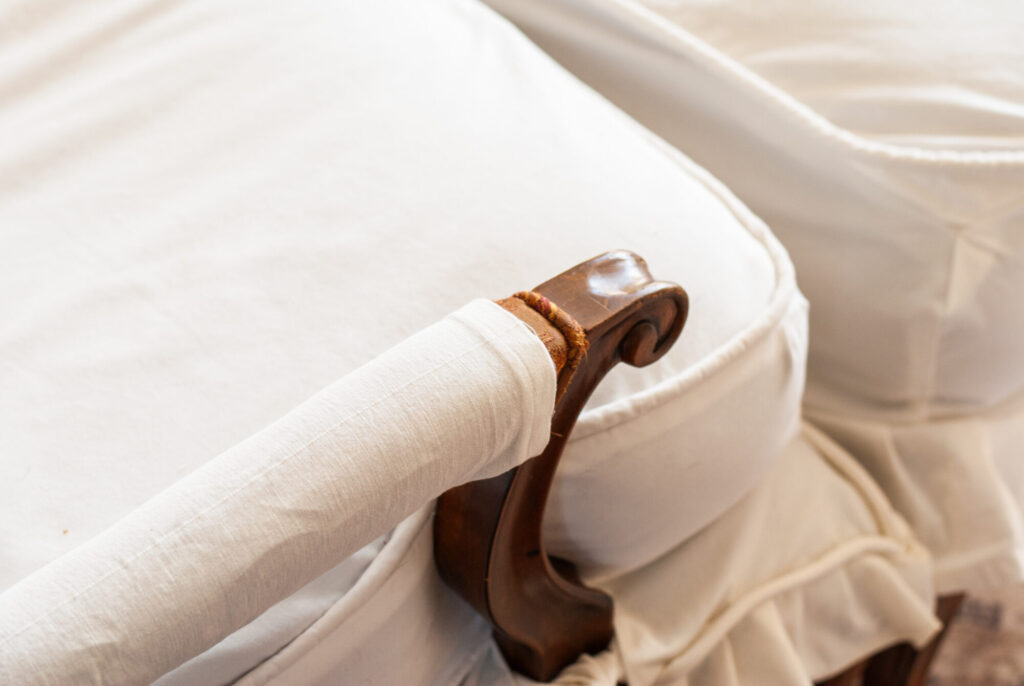
I decided to cover the arms of the chair since there were upholstered pieces of fabric there as well.
However, I still liked the look of the exposed wood on the arms.
Cut a rectangular piece of fabric to wrap around the arm allowing for seam allowances.
Next, press the edges of the rectangle similar to the way you pressed the edges of the ties.
Stitch all the way around the outer edges of the fabric.
I applied the fabric to the arms of the chair using safety pins for easy removal. However, you could add a zipper or buttons for a more polished look.
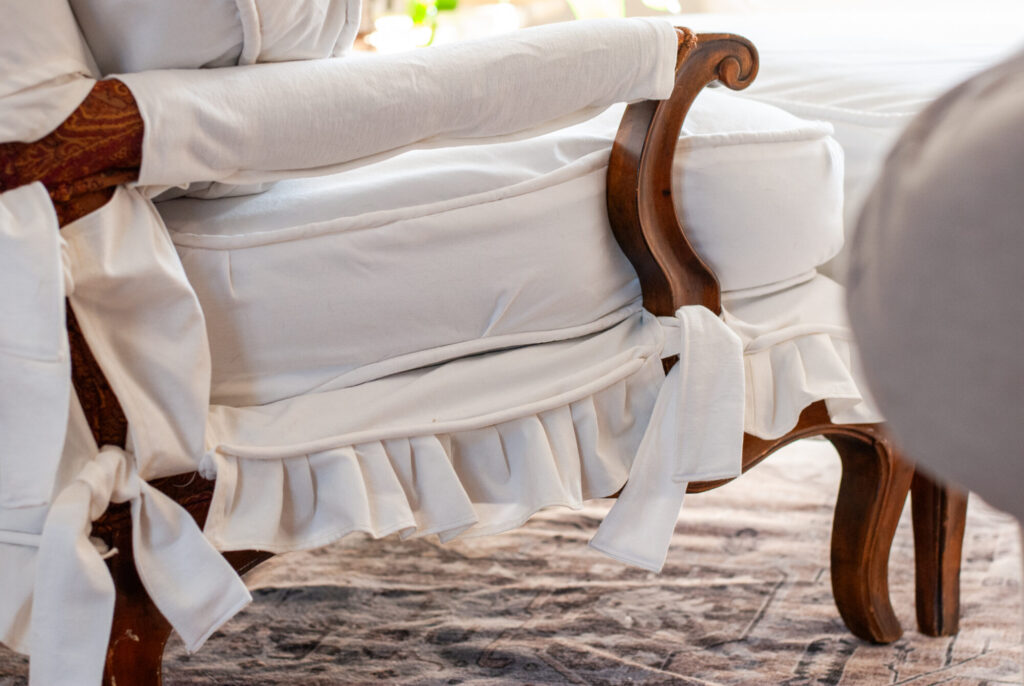
Once you’re finished with your slipcover, iron all the edges and press your seams. This will give it a more polished look.
Helpful Tips When Making A Bergere Chair Slipcover
Pre-shrink your fabric by washing and drying it before you use it. If you don’t pre-shrink, your slipcover won’t fit after it’s washed.
Press your fabric. Keep an iron nearby. Make sure to press your fabric throughout the project. This helps with creating hems and ensures you have smooth, crisp seams.
Keep the sewing machine close by and test fit frequently. You’ll need to sew this project a little at a time as you go. Test the fit after sewing each seam. Having the sewing machine nearby will make things easier.
Keep a seam ripper handy. There will most likely be seams during the fit process that you don’t like. You can take them apart and restitch them if needed.
Do not expect perfection. This slipcover project isn’t perfect. You’ll have to be ok with imperfections.
I prefer the look of ties in my slipcovers, but you could also use zippers for a more polished look. Sew zippers to the back of the cushions for easy removal for washing.
FAQs
What is the best slipcover fabric?
Medium-weight fabrics like canvas, cotton duck, or linen are great for making slip covers. Hemp is also a good choice. I recommend Starting with an inexpensive fabric if this is your first project.
How much fabric will I need to make the project?
You will need around 10 yards if you’re making the piping for your project. I recommend buying extra in case you make mistakes.
Is a sewing machine required for this project?
Yes, you’ll need a sewing machine to sew your slipcover. It will not old up very well if you use fabric glue.
Final Thoughts on Making the Bergere Chair Slipcover
Sewing a slipcover can seem like a very intimidating project. However, you’ll find that it’s done in simple steps and sewn along the way. It’s also a very forgiving project, and mistakes are easily corrected. I hope you enjoy making it and personalizing it to suit your own style.
If you enjoyed this tutorial, please share it!

More From The Farm
Our DIY chicken coop project turned out great. While it’s not as lovely as some of the other coops out there, it’s large and serves its purpose well. I also have a lot of ideas to make it pretty in the future.
Leave a Reply