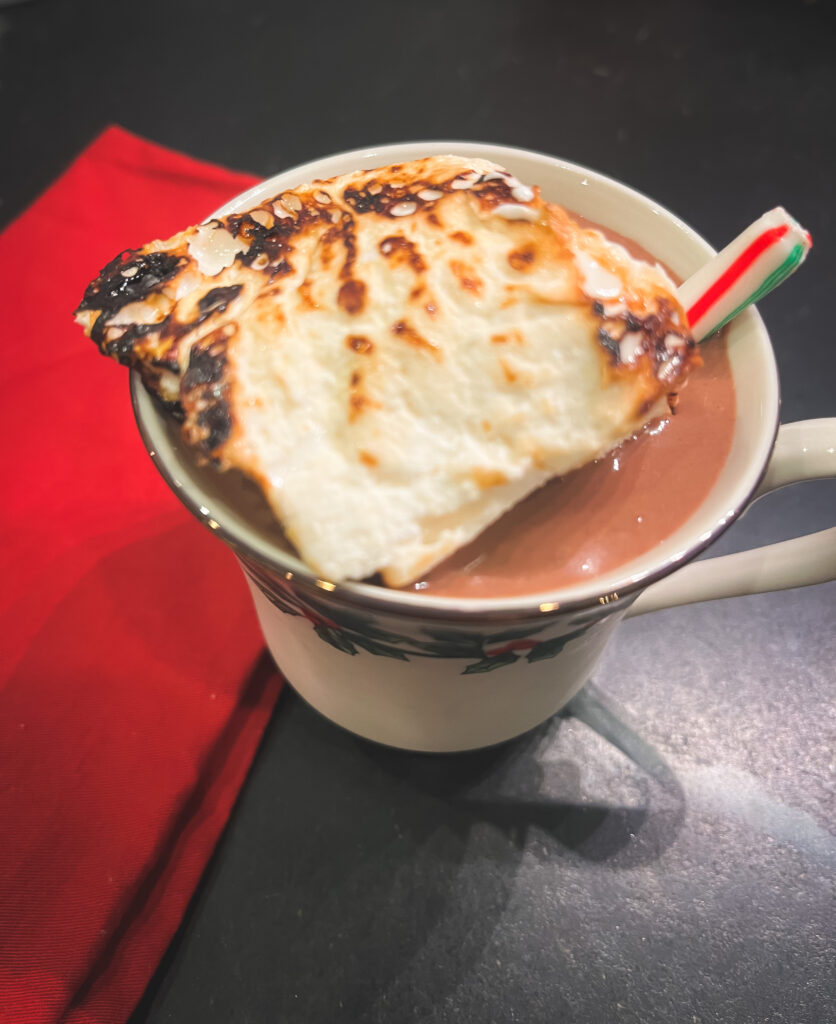
Hot chocolate with homemade marshmallows are a great tradition to make cold nights special.
During the Christmas season, hot chocolate with homemade marshmallows are a special way we celebrate the holiday. We started this tradition a few years ago when one of my boys was obsessed with a certain Christmas train movie. The catchy theme song “hot hot” sparked a hot chocolate and movie night. We’ve been carrying on the tradition since.
You are probably familiar with the powdered mixes are ready to go. However, I’m not a fan of those. They often contain a lot of bad things I don’t need in my hot chocolate. Hot chocolate is really easy to make from scratch with minimal ingredients I always have on hand.
Jump to Recipe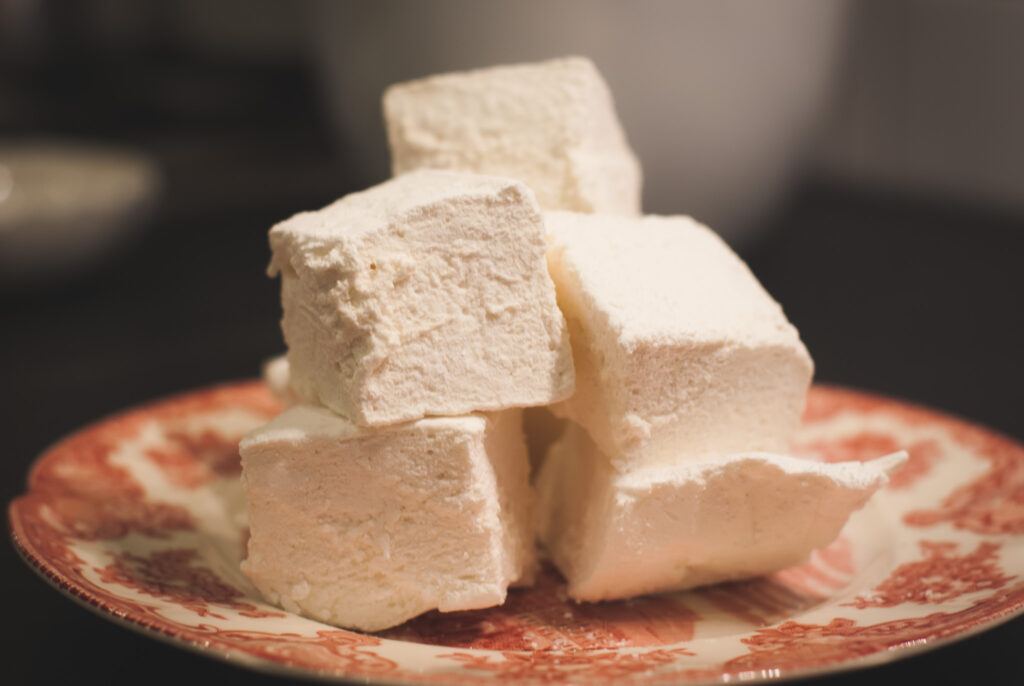
Making Hot Chocolate
My hot chocolate recipe is very simple to make, yet it is rich and delicious.
- Start by slowly heating 4 cups of whole milk. You want to be careful not to scorch the milk during the heating process.
- After the milk is simmering slightly, add 1 1/2 cups semi sweet chocolate chips.
- Next, stir the hot chocolate until the chips have all melted into a cohesive drink.
- Lastly remove the milk mixture from the heat and stir in 1 teaspoon of good vanilla flavoring. That’s it!
Sometimes I add in a little peppermint extract to make the hot chocolate really special. Half and half could also be substituted instead of whole milk for a creamier texture.
Homemade Marshmallows
A cup of hot chocolate isn’t complete without a pillow of melted marshmallow. Marshmallows that leave a sticky white line on your upper lip are the best. Making homemade marshmallows isn’t as difficult as it may seem. I can promise you that they are far better than anything you will ever buy pre-made.
A lot of homemade marshmallow recipes contain corn syrup. I don’t like to use corn syrup in my recipes. I’ve found that maple syrup works great and is delicious.
Making marshmallows from scratch isn’t hard. However, there are several important steps that must be followed exactly.
Making Homemade Marshmallows
Step 1: Before you start the cooking process gather all of your supplies. I feel like this makes everything go more smoothly. For this recipe you will need
- a heavy stainless steel cooking pot with a lid.
- A candy thermometer
- High speed stand mixer with whisk attachment
- Parchment Paper
- 8×8 pan
- Spatula
Step 2: After gathering your equipment, measure out the ingredients prior to starting. The ingredients needed are:
- 411 g pure Cane Sugar
- 1/3 cup pure maple syrup
- 1 cup water divided (1/2 cup for sugar and 1/2 cup for gelatin)
- 7 tsp (3 packs) of unflavored gelatin
- 1/4 tsp salt
- 1 tsp pure vanilla extract
- 1/2 cup confectioner’s sugar
- 1/4 cup cornstarch
Step 3: Begin by combining the sugar, maple syrup, and 1/2 cup of water in the pot. Stir well to combing the ingredients making sure the water and syrup saturate the sugar. Heat the mixture over medium heat until it comes to a boil.
Step 4: Next, cover the pot with the lid and let it cook for 2 minutes over medium heat. Once 2 minutes have passed, remove the lid and let the condensation run down the sides of the pot. After that, replace the lid and continue cooking for 1 additional minute. ( You do not want any unmelted sugar on the sides of the pot).
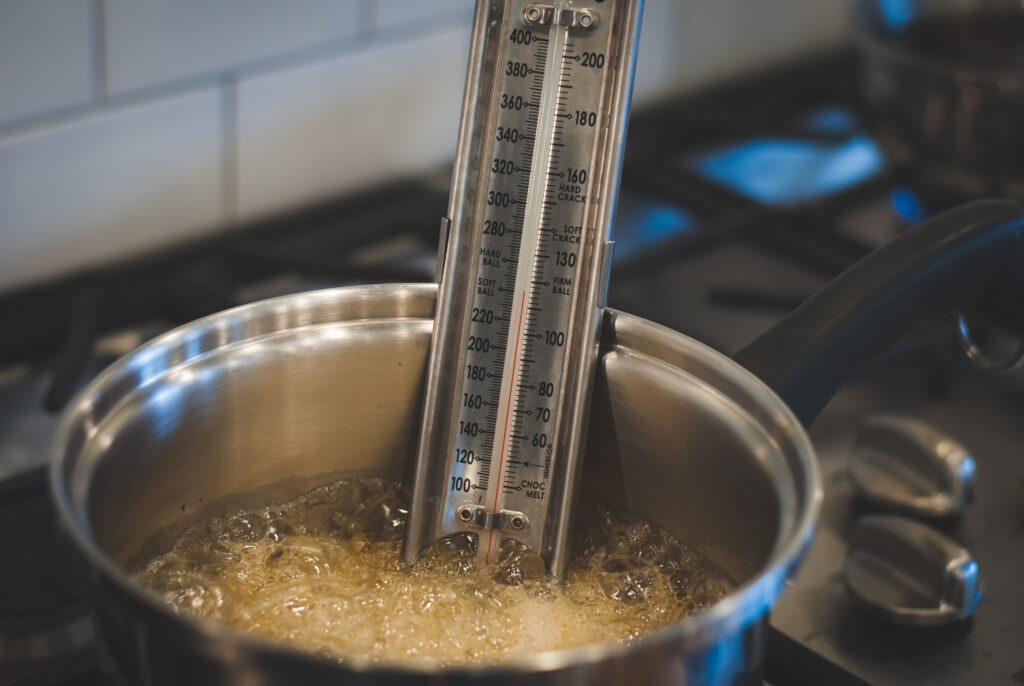
Step 5: After covering for an additional minute, remove the lid and insert a candy thermometer. Continue cooking on medium heat until syrup reaches 242°F. (never let your candy thermometer touch the bottom of the pot)
Step 6: In the mean time, combine 1/2 cup water and the gelatin in your stand mixer bowl. The intention is to allow the gelatin to fully absorb the water.
Step 7: Once the syrup has reached a temperature of 242° (soft ball) on the candy thermometer, remove it from the heat. Allow the syrup to rest for a moment, and the bubbling to stop.
Whisking the Marshmallows
Step 8: Meanwhile turn the stand mixer on at medium speed. Slowly pour the syrup into the mixing bowl allowing it to flow down the sides. This cools the syrup enough to prevent scorching of the gelatin.
Step 9: After the syrup has incorporated with the gelatin, add in your salt. Next, allow the mixer to remain at medium speed for 3 minutes. The syrup should double in size. Once the syrup has doubled, turn the mixer to high speed and continue whisking for another 3 minutes. Add in the vanilla flavoring and continue mixing for 1 additional minute.
Step 10: Butter your spatula to prevent sticking, and transfer the marshmallow mixture to an 8X8 pan lined with parchment paper. Finally, allow the mixture to set for at least 8 hours. I let it set overnight.
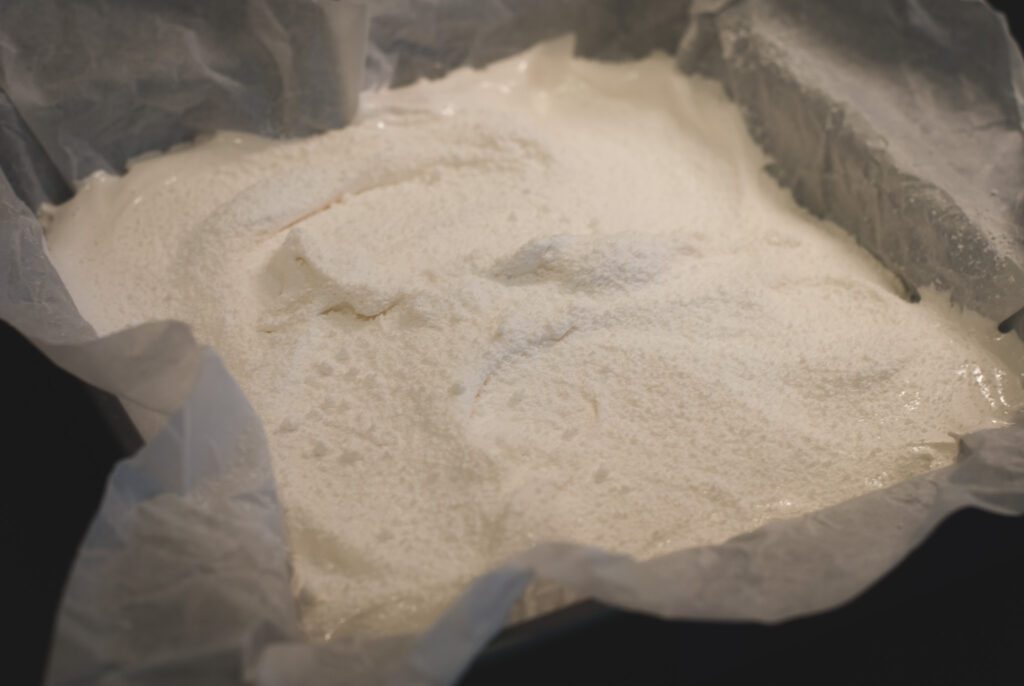
Step 11: After the marshmallow have completely set, cut them into squares. Lastly, combine the powdered sugar and cornstarch. Dust the edges of the marshmallows in the mixture to prevent sticking.
Other Marshmallow Serving Ideas
Generally speaking, toasting the marshmallow and serving it with a hot cup of hot chocolate is our favorite way to enjoy them. Occasionally we enjoy them other ways too,
Oven S’Mores
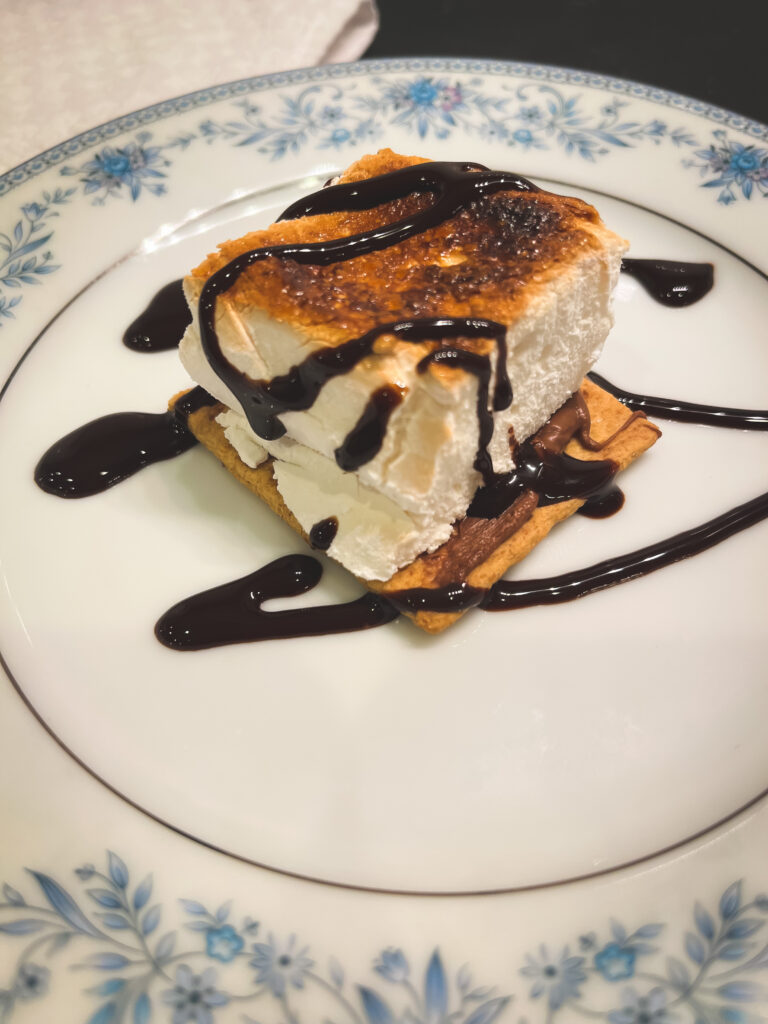
Oven S’mores are an easy treat my family loves. For oven S’mores:
- Begin by gathering graham crackers, hazelnut spread, and homemade marshmallows.
- Next, smooth hazelnut spread on one side of the graham cracker, and place them on a sheet pan lined with parchment.
- Top with a marshmallow square.
- Lastly set the oven to broil, and place the s’mores under the heat until they are brown.
I spread on the hazelnut prior to putting the S’mores in the oven. I feel like it gives the spread a toasted flavor. However, you could spread the hazelnut on the cracker after the broiler time if you prefer a smoother texture.
Homemade Marshmallows Dipped in Orange chocolate
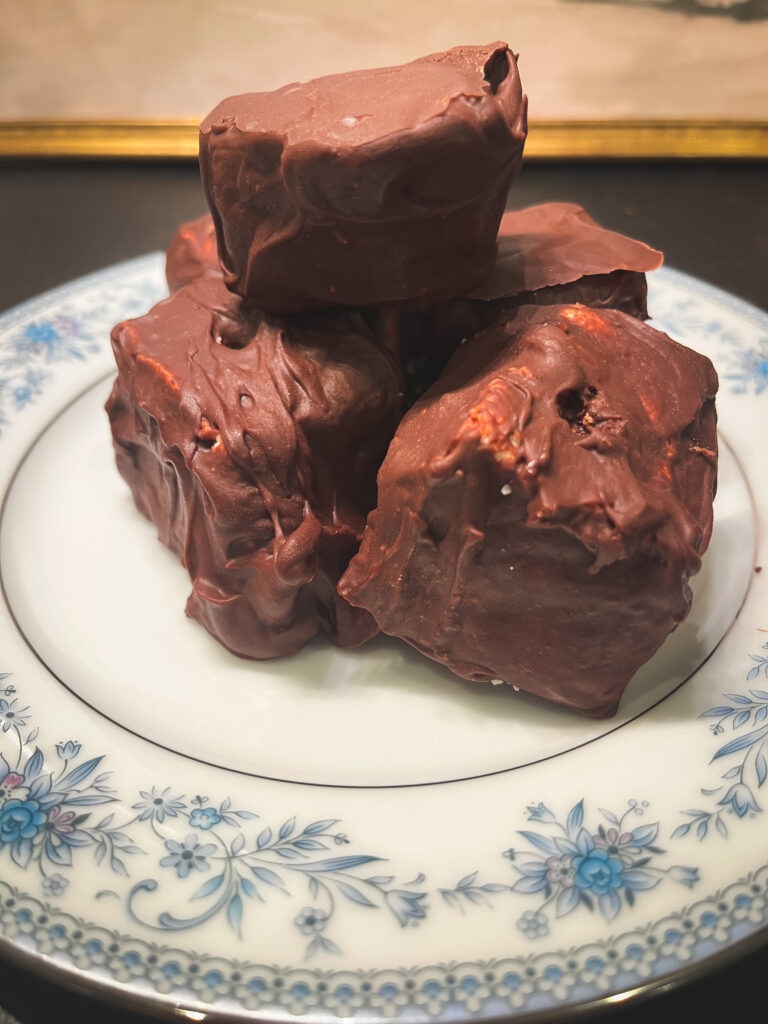
Homemade marshmallows dipped in melted chocolate is also a favorite of ours. This treat is very simple, and can be easily modified with different flavors. For homemade marshmallows dipped in melted chocolate:
- Start by gathering 1 cup semi-sweet chocolate chips, 1TBSP maple syrup, 1/4 cup whole milk, and 1/2 tsp orange zest.
- Next, melt the ingredients together over a double boiler until the chocolate is smooth.
- Once the chocolate has melted, submerge the marshmallow squares in the chocolate.
- Lastly, allow the chocolate dip marshmallow squares to cool prior to serving.
I let the melted chocolate cool slightly prior to dipping the marshmallows. This prevents them from melting. I also insure the marshmallows are completely set before I dip them in melted chocolate.
Homemade Marshmallows FAQs
Do I need a candy thermometer?
Yes! It helps get the sugar to the right temperature, which is super important for fluffy marshmallows. Without it, the texture might turn out wrong.
How long do homemade marshmallows last?
They last about 2-3 weeks if you store them in an airtight container at room temperature. No need to refrigerate them!
Can I make marshmallows without gelatin?
Yep! You can use agar powder as a vegetarian option, but the texture might be a bit different—still tasty, though!
Can I flavor homemade marshmallows?
Absolutely! Add vanilla, peppermint, or even a fruity flavor to change things up. Just add a little extract to the mixture while whipping.
Can I make marshmallows without a mixer?
It’s tricky without a mixer, since the mixture needs to be whipped for a while. A hand mixer can work, but a stand mixer makes it way easier.
Why are my marshmallows sticky?
Homemade marshmallows can get a bit sticky. Dusting them with powdered sugar or cornstarch helps keep them from sticking to everything.
Can I use them in hot chocolate?
Definitely! They’re amazing in hot chocolate because they melt so nicely. Just drop a few in and enjoy!
Can I make shapes with homemade marshmallows?
For sure! Pour the mixture into a pan, let it set, and use cookie cutters to make fun shapes once they’re firm.
Final Thoughts
Making homemade marshmallows is totally worth it! They’re softer, fluffier, and way tastier than store-bought ones, plus you get to customize them however you want. Whether you’re roasting them over a campfire, adding them to hot chocolate, or just eating them as a treat, homemade marshmallows bring a little magic to each bite. And once you see how easy they are to make, you might never go back to the store-bought kind.
If you enjoyed this marshmallow article, please share it!
More From The Farm
If you’re looking for an easy, cozy dessert to capture the taste of fall, this pumpkin cobbler crock pot recipe is perfect! It’s easier than baking a pumpkin pie, but still just as delicious. There’s no rolling out dough or baking needed. Just toss everything in the crockpot, let the warm spices and pumpkin fill your kitchen with that amazing autumn smell, and enjoy!
This dessert is perfect for holiday gatherings or even a fun fall night at home with family. It’s sweet, and soft, and has all the flavors of pumpkin pie with half the work.
Homemade Marshmallows
Equipment
- 1 Heavy stainless steel pot with a lid
- Stand mixer with a whisk
- Candy Thermometer
- Spatula
- Parchment Paper
- 8×8 pan
Ingredients
- 411 g pure cane sugar
- 1 cup water divided
- 1/3 cup maple syrup
- 7 tsp unflavored gelatin (about 3 packs)
- 1/4 tsp salt
- 1 tsp pure vanilla extract
- 1/2 cup powdered sugar
- 1/4 cup cornstarch
Instructions
- Begin by combining the sugar, maple syrup, and 1/2 cup of water in the pot. Stir well to combing the ingredients making sure the water and syrup saturate the sugar. Heat the mixture stirring slowly over medium heat until it comes to a slow boil.
- Next, cover the pot with the lid and let it cook for 2-3 minutes over medium heat. After 3 minutes have passed, remove the lid and let the condensation run down the sides of the pot. ( You do not want any unmelted sugar on the sides of the pot).
- After covering for an additional minute, remove the lid and insert a candy thermometer. Continue cooking on medium heat until syrup reaches 242°F.
- In the mean time, combine 1/2 cup water and the gelatin in your stand mixer bowl. Allow the gelatin to fully absorb the water for around 10 minutes.
- Once the syrup has reached a temperature of 242° on the candy thermometer, remove it from the heat. Allow the syrup to rest for a moment, and the bubbling to stop.
- Meanwhile turn the stand mixer on at medium speed. Slowly pour the syrup into the mixing bowl allowing it to flow down the sides. This cools the syrup enough to prevent scorching of the gelatin.
- After the syrup has incorporated with the gelatin, add in your salt. Next, allow the mixer to remain at medium speed for 3 minutes. The mixture should double in size. Once the syrup has doubled, turn the mixer to high speed and continue whisking for another 3 minutes. Add in the vanilla flavoring and continue mixing for 1 additional minute.
- Butter your spatula to prevent sticking, and transfer the marshmallow mixture to an 8X8 pan lined with parchment paper. Finally, allow the mixture to set for at least 8 hours. I let it set overnight.
- After the marshmallow have completely set, cut the into squares. Lastly, combine the powdered sugar and cornstarch. Dust the edges of the marshmallows in the cornstarch to prevent sticking.
Hot Chocolate without the Mix
Equipment
- 1 heavy bottom pot
Ingredients
- 4 cups whole milk
- 1 1/2 cups semi-sweet chocolate chips
- 1 tsp pure vanilla extract
Instructions
- Heat the milk over medium heat until it comes to a slow simmer.
- Stir gently being sure not to scorch the milk
- Stir in chocolate chips and continue to simmer until everything is incorporated.
- Remove from heat and stir in vanilla extract.
In addition to these I have more holiday treats. Check out my thumbprint cookie recipe.
These were so good and easy to make! Can’t wait to try them toasted.
So glad you liked them!