Spring Planting is just around the corner, and it’s time to wake up the garden.
Nothing gets me more excited than the prospect of spring. The promise of new life, and the end to cold gray days stirs in my soul. February brings so much preparation for the garden that has been sleeping for the past few months. Here are 4 ways to wake up the garden for spring planting.
This article is assuming you have your garden structure already in place. If you are just starting out with a garden for the first time, you’ll definitely need more preparations than the ones listed here.
Spring Planting FAQs

When should I prepare my garden for spring planting?
The answer to this question will vary for everyone. I live in zone 7b so seeding starting and garden preparations start to pick up in mid February. However, garden preparations should last all year long. After the growing season is over in fall, putting the garden to bed with a cover crop or tarp will preserve soil health for spring. Soil testing and amendments should be made prior to planting. Late winter is a great time for this, as compost needs to sit on the garden for a month or two before it’s used.
When should I start seedlings for spring planting?
Most seedlings need time to germinate. Look on the back of the seed packet for your specific seed start time depending on your regions last frost date. This is a great site for finding your frost dates based on your zip code.
What supplies are needed for spring planting?
Spring planting can be as complicated or simple as you wish. The most important thing you will need are the seeds. Seeds can be saved from a previous year’s crop, or purchased from a retailer. Many big box stores also carry seeds. I purchase seeds and plants from a local feed store in my town. I also order online from Johnny’s Seeds and Baker Creek.
Seeds can be started something as simple as a recycled milk jug. The jug makes for a mini greenhouse. Saving seedling trays from previous year’s seedlings is also great for starting new seeds. These seed starting trays form amazon work great if you want something more contained. Grow lights or a warming pad will aid in germination. If you are lucky enough to have a climate controlled green house, that is the best way to start your seeds.
Seed starting isn’t even necessary for spring planting. Seedlings can be purchased from big box stores, feed stores, and plant nurseries ready to transplant directly in the ground.
Generally, a few garden tools are also necessary. You shouldn’t need anything expensive. A basic hoe and trowel will take you a long way. I love this kit.

Step 1 Putting the Garden to Bed
Putting the garden to be may seem like the opposite of spring preparations, but that couldn’t be farther from the truth. Spring planting begins in fall after the last frost. Leaving open soil all winter will cause so many problems for spring. Nature does not like to be naked. Open soil will soon have unwanted invasive weeds seeding and growing everywhere. Exposed soil is also opening it to erosion. Putting your garden to bed will preserve your soil health, and protect the topsoil from being washed away. This makes spring prep much easier, while providing the environment for better crops.
Putting the garden to bed can happen a couple of different ways. Start by removing spent plants. You can cut them off at their base so you aren’t pulling up the root system with much needed nutrients. The roots will slowly decompose and add to the soil’s health. I do recommend removing the spent plants and burning them instead of adding them to the compost pile. Composting plants with disease or pest infestation will only bring the problem back in future planting seasons.
After the old plants are removed, planting a cover crop will protect the soil while adding nutrients for the next season. Cover crops will vary depending on the growing zone you live in and what you are trying to accomplish in your soil. for example: Buckwheat and Crimson Clover are great cover crops for managing pests. They attract beneficial insects.
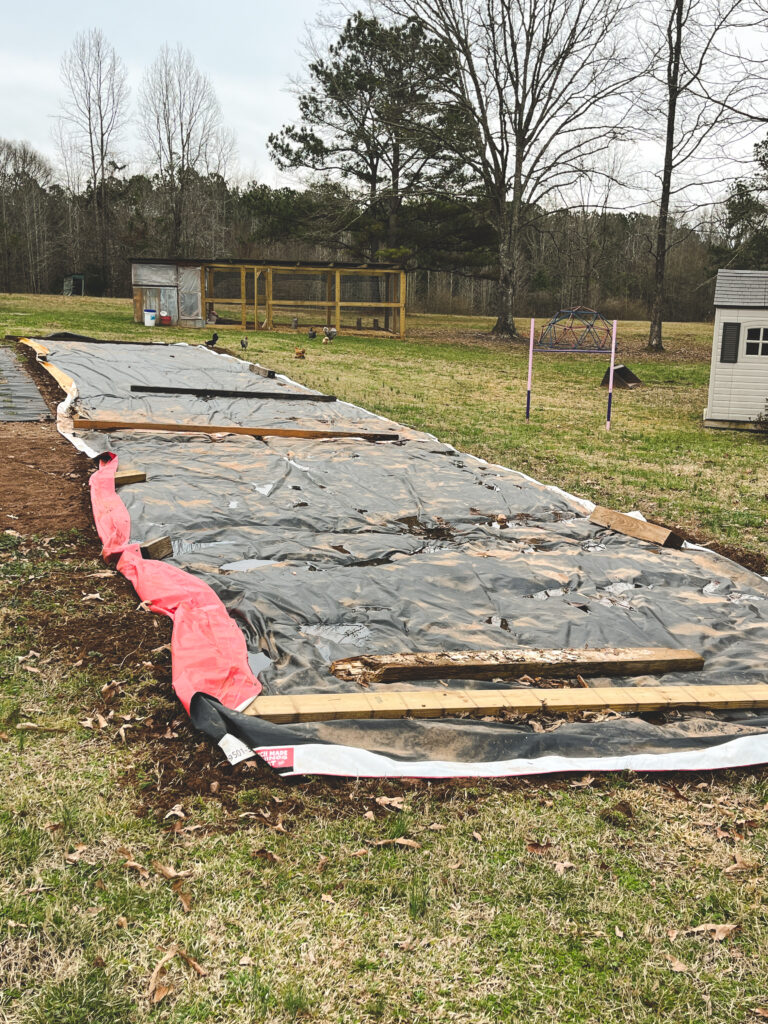
The method we chose for our garden is covering it completely. This can be done with vinyl tarps, landscape plastic, or cardboard boxes. My husband acquired old billboards for free locally, so we used them to cover the garden. Covering the garden prevents weeds from seeding, protects the soil from erosion, kills off weeds already established by blocking them from sunlight, and is a great habitat for earthworms.
Covering your beds with dead leaves, grass clippings and pine straw will also help put the garden to bed. Organic matter will break down over winter and add much needed nutrients to the soil.

Step 2 Uncovering the Garden
Around 6 weeks before you plan to start your garden begin prepping the soil. If you have a cover crop, lightly till the soil before the crop seeds. Allow the dead crops to remain in the soil for added nutrients. Waiting until the late winter to do this will also help with erosion. Add a layer of compost over the top of the soil after tilling.
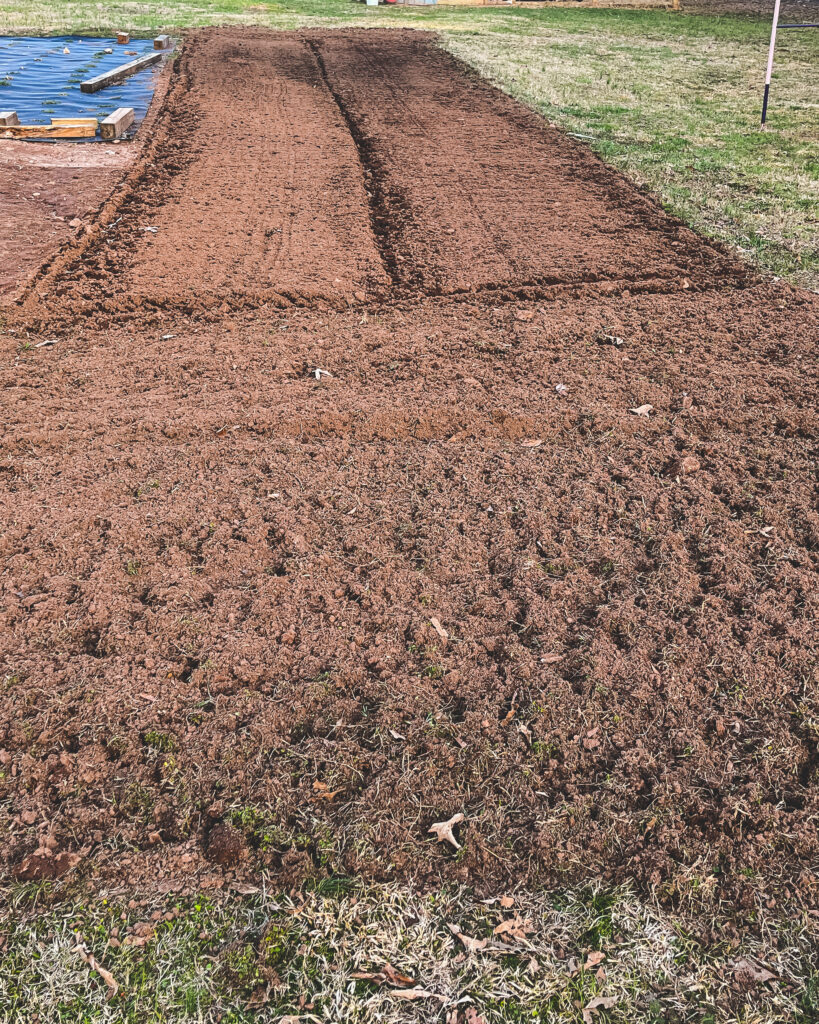
If using tarp or cover for your garden, simply remove the cover. My husband recently removed our vinyl billboard, and the soil underneath was beautiful. There were so many earthworms. After uncovering the soil, add a thin layer of compost on top. If you are using any soil amendments add them in as well. If you have chickens, this is a great time to add the manure.

Step 3 Garden Design
laying out your garden is an important part of planning for spring planting. This can sometimes be the most complicated part of gardening. Companion planting can help to reduce pests by attracting beneficial insects and pollinators. Some plants will need to have a space to climb, so an additional structure is needed. Many vegetables need room to spread out, while others like to be tightly packed. Planning for weed control is also crucial.
Another important part of garden design is sunlight. Some areas of your garden might receive morning or afternoon shade. You will need to plan your plants in this area accordingly. Observe your garden closely during all times of the day to better understand the flow of sunlight.
Step 4 Irrigation
Getting water to your garden is a significant part of waking it up. If you do not have an irrigation system installed, you need to have plan on how you’re getting water to your plants. Setting up a rain barrel system is a great way to reuse rain water. You should check to make sure your state doesn’t have laws against collecting rain water. A hose, drip tubing, and a timer on a water spigot will also serve you well. This will ensure you plants are getting adequate water daily without you physically watering them yourself.
Soil drainage is another important consideration. Most plants do not like standing water or saturated soil. It’s important to observe the drainage quality of the soil prior to planting. Thoroughly saturate the area, or observe it after a rain, and notice how quickly it drains or if it holds water.
Final Thoughts
Prepping your garden beds for spring planting begins in the fall with soil preservation and cover crops. This makes prepping the beds for spring so much easier. Taking the time to prepare your beds will ensure you have a high yielding garden year after year.
Want to up your garden game and stay organized this season? Download my FREE Garden Planner and stay on track! It has everything you need to document your planting and plan your garden layout.
If you enjoyed this garden post, please share it! Thanks for visiting the farm.

[…] Spring Planting […]